How To Buy Polkadot (DOT)
A Step-by-Step Guide
Step 1 -
Signup to Coinbase - Get Free $10
You’ll first need to purchase one of the major currencies. Exchanges usually accept either Bitcoin (BTC) or Ethereum (ETH) in exchange for Altcoins. Click the button below to register and receive your first $10.

Step 2 -
Send Your Funds To An Exchange
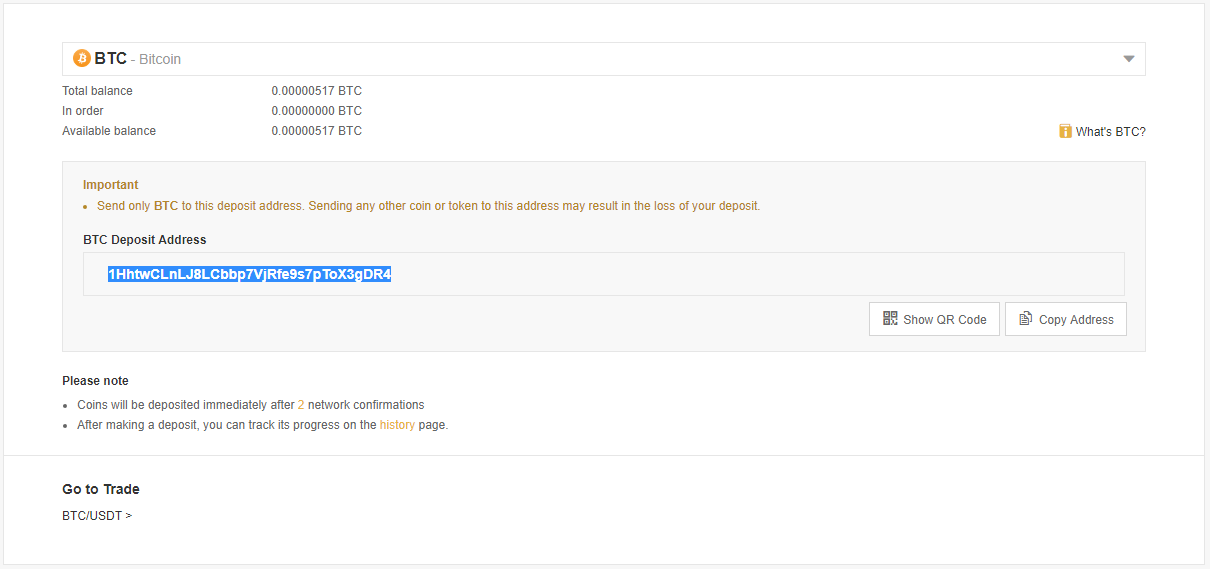
You’ll now need to send your Bitcoin (BTC) or Ethereum (ETH) over to an exchange. All exchanges have a similar deposit method. Polkadot (DOT) is available on Binance, so we’ll use that as an example. Unsure about how to send funds from Coinbase? (Follow this guide)
Make sure you’ve selected the correct coin you wish to deposit. BTC must be sent to a BTC deposit address, etc. If you are dealing with a Decentralized Exchange such as IDEX, these steps may be different (Follow Our Guide)
Step 2 -
Send Your Funds To An Exchange
You’ll now need to send your Bitcoin (BTC) or Ethereum (ETH) over to an exchange. All exchanges have a similar deposit method. Polkadot (DOT) is available on Binance, so we’ll use that as an example. Unsure about how to send funds from Coinbase? (Follow this guide)
Make sure you’ve selected the correct coin you wish to deposit. BTC must be sent to a BTC deposit address, etc. If you are dealing with a Decentralized Exchange such as IDEX, these steps may be different (Follow Our Guide)
Step 3 -
Locate Polkadot (DOT)
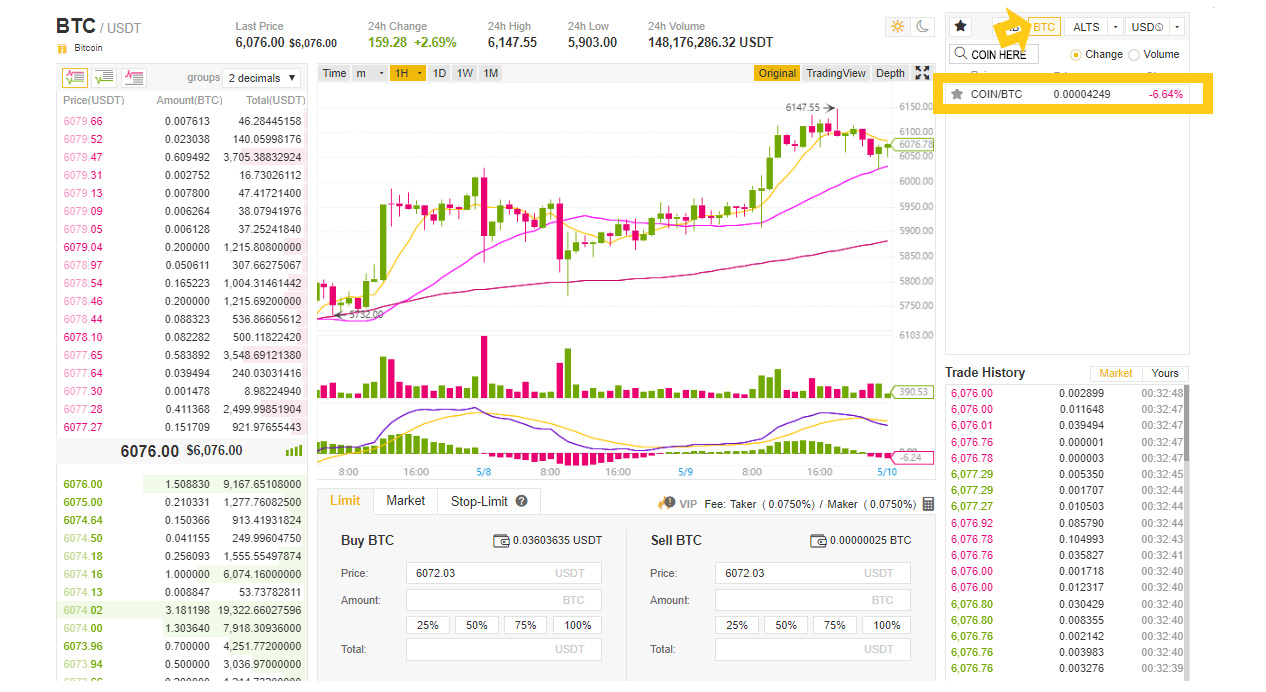
Once your deposit has confirmed, you’ll now have access to your funds and you can begin purchasing/trading. To purchase Polkadot (DOT) on Binance, you’ll want to hover over the “Exchange” tab and click on “Basic”.
To locate Polkadot (DOT), you’ll need to type the coins “ticker” (DOT) into the search box highlighted in the picture we have provided. Make sure you have selected the correct pairing, we’ve highlighted this too. Click on “DOT/BTC” to proceed.
Step 4 -
Purchase Polkadot (DOT)
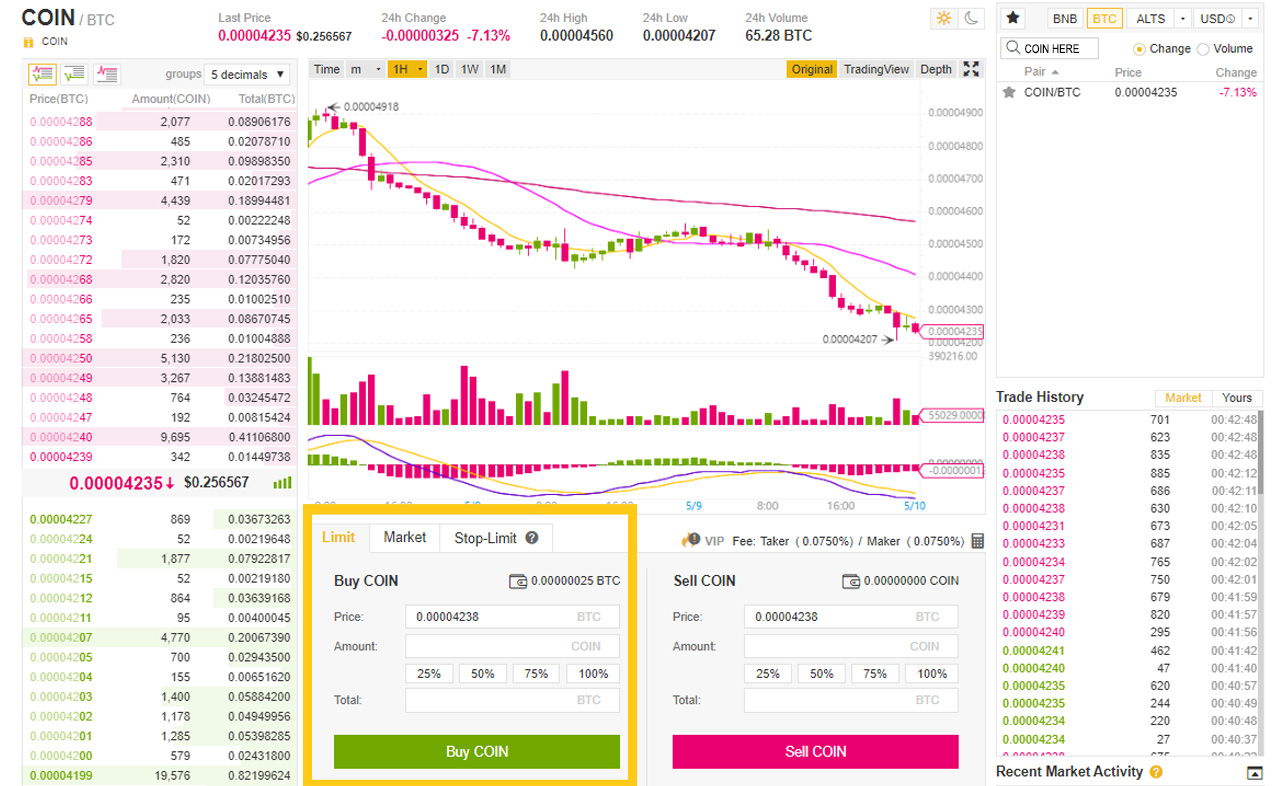
Once you’ve located Polkadot (DOT), you’ll be presented with a Price Chart (Center) and some Order Books (Left). For now, we’re going to create our own Limit Order.
The “Price” field will be automatically filled with the most recent price Polkadot (DOT) was sold for although this can be changed to your desired price. The “Amount” field is the amount of DOT you wish to purchase. The “Total” field is the total price in BTC that you will pay for the whole amount.
When you’re happy, click “Buy DOT”. Your order will be filled when a Seller sells their DOT for the price you submitted.
Step 4 -
Purchase Polkadot (DOT)
Once you’ve located Polkadot (DOT), you’ll be presented with a Price Chart (Center) and some Order Books (Left). For now, we’re going to create our own Limit Order.
The “Price” field will be automatically filled with the most recent price Polkadot (DOT) was sold for although this can be changed to your desired price. The “Amount” field is the amount of DOT you wish to purchase. The “Total” field is the total price in BTC that you will pay for the whole amount.
When you’re happy, click “Buy DOT”. Your order will be filled when a Seller sells their DOT for the price you submitted.
Step 5 -
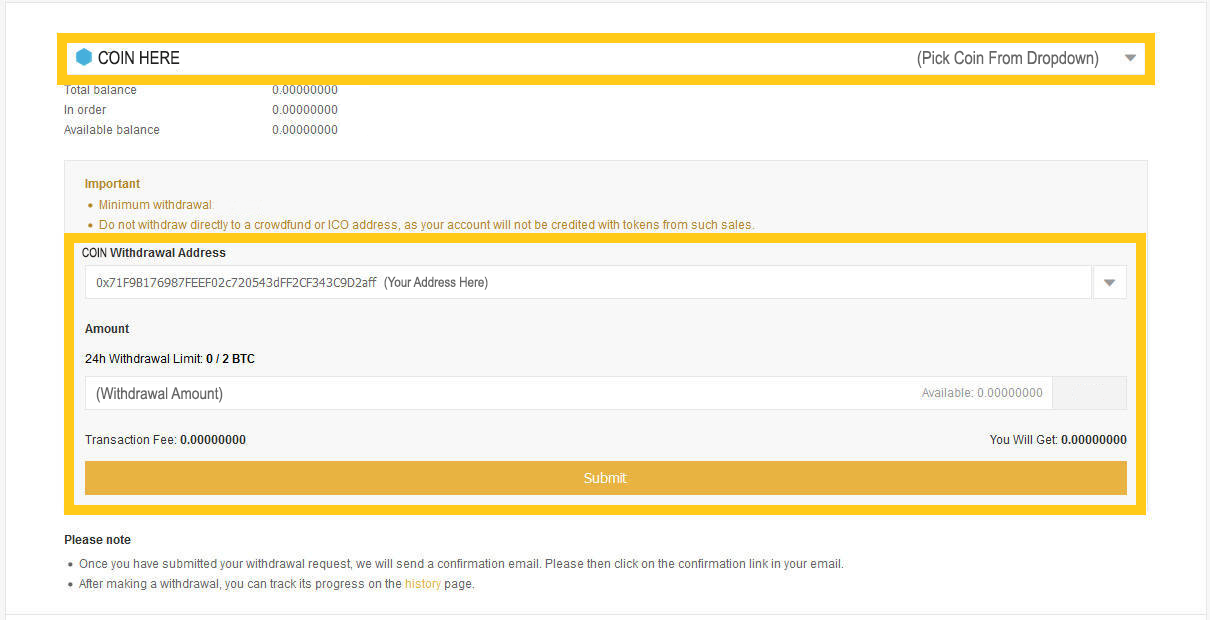
Withdraw Polkadot (DOT)
Unless you’re trading, never keep your coins on an exchange for an extended period of time. To withdraw your Polkadot (DOT), hover over the “Funds” tab and click on “Withdrawals”. Polkadot (DOT) can be safely stored using MyEtherWallet, so we’ll use that. (MyEtherWallet Setup Guide)
Locate Polkadot (DOT) by using the drop-down box provided. Enter the amount of DOT you’d like to withdraw taking into account the fees/minimums shown and make sure the withdraw address you have entered is yours and is correct.
When you’re happy, click “Submit”. You may be asked for phone/email verification before a withdrawal can be processed.
Congratulations!
You've Successfully Purchased & Stored Polkadot (DOT)
That’s it!
Withdrawals from Exchanges can take anywhere from 1-30 minutes depending on network usage. Once you’ve confirmed your withdrawal using Etherscan.io or Ethplorer.io and the DOT is safe inside your wallet, you’re all done.